USER MANUAL Introduction
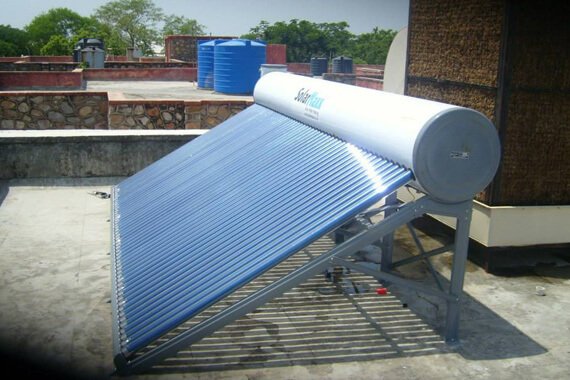
Our SolarMaxx Solar Water Heating systems are manufactured with serious quality control measures. Our manufacturing facilities have been awarded with ISO 9001:2000 certification for their management and products, CCC certificate for Qualified Products and CE certificate for conformity with European Standards.
The product Structure
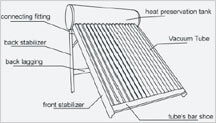
There are four holes on the heat preservation tank
- Water inlet hole
- Water outlet hole
- Hole for electric heating back-up
- Link hole (opening for air exhaustion and water overflow
Use of detergent is advisable while installing the vacuum tubes to lubricate the screws.
Working principles
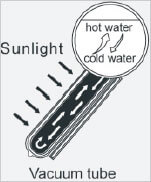
Illusions4real’s SolarMaxx Solar Water Heating systems run on Solar Energy the heat emitted by the Solar Radiation during day time. All models consist of 3 main parts of Vacuum tubes, heat preservation tank (water tank) and the support frame. Vacuum tubes are made of twin borosilicate glass tubes using advanced international technology. The outer Part of the inner tube is coated with aluminium nitride that can endure a temperature of upto 350o C. The vacuum tubes absorb the sunlight and convert the solar energy into power. Continuous circulation of water through the vacuum tubes increases the temperature of the water continuously. Heat preservation tank ensures water is kept hot for a Longer duration. To ensure smooth hot water supply even during cloudy days our water heaters come with an inbuilt power back up.
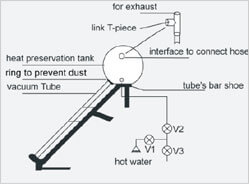
Installation Diagram
When using the product for the first time or after a long time, it is advisable to allow water inflow during morning or night time. Water inflow during the day could damage the vacuum tubes.
Installation Instruction
The water heater should be installed at a place where it can fully absorb the sunlight. Place the main body facing south for maximum efficiency.
- For installation, following order
- install the support frame,
- the water tank
- the aluminium reflectors, and
- the vacuum tube
- While installing the vacuum tubes, set the rear undercarriage into the rear undercarriage board first. Apply detergent on the surface of the tubes. Screw the tubes slowly into the water tank followed by screwing back to the undercarriage board. Install the two tubes at the far ends of the tank first and then install other tubes.
- Pipes should be attached after installation of the water heater. There are 4 holes on both sides of the surface of the water tank. Make sure the exhaust pipe is installed properly to prevent any damage to the water tank
- When using the product either for the first time or after a long time, it is advisable to allow water inflow during morning or night time. Do not allow water inflow during the day as it could damage the vacuum tubes.
Parallel Connection
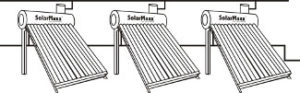
Parallel Connection
User Guide
- Supply water for the first time when the vacuum pipes are not too hot.
- When using the product either for the first times or after a long time, it is advisable to allow water inflow during morning or night time. Do not allow water inflow during the day as it could damage the vacuum tubes.
- Avoid long duration exposure of the water heater without water as it will shorten the lifespan of the seal and vacuum tubes.
- Never switch on the power back up without water in the water tank.
- Keep the water tank full if the region you reside in experiences high frequency of storms
- If your region experiences heavy snowfall, clear the snow off the reflectors and vacuum tubes regularly.
Solar Water Heater-Warning
If your product has electric backup, please turn off it’s power supply before dismantling the solar water heater.